The second part Part II is the core description of Laravel Auth routes for Laravel 6.0, 5.8 and older versions. The core of framework related to the “Auth routes” is almost similar in the recent versions except ones that is about the {hash} of email in the verification link and I described it in Part III (Laravel 6 Email Verification Routes).
Before you continue with the rest of this tutorial, I would like to introduce two packages for Laravel that I have recently developed: Laravel Pay Pocket, a modern multi-wallet package, and Laravel Failed Jobs, a UI for the Laravel Failed Jobs Table. I hope they may be of help to you.
https://github.com/HPWebdeveloper/laravel-pay-pocket
https://github.com/HPWebdeveloper/laravel-failed-jobs

Also for semantic versioning in Laravel 6 read this new article.
For installing Laravel 6 in Ubuntu read this new article and also LAMP stack in Ubuntu.
Part I:
Update Nov 2019: Taylor just released Laravel Installer 2.3.0… added a new “ — auth” flag to create a new project with the authentication scaffolding installed and ready to go!
It means we can do:
laravel new project --authHow to update laravel/installer : read here
It means this command:
laravel new my-test-app --authIs the shorthand of four following commands:
Laravel new my-test-appcd my-test-appcomposer require laravel/ui --devphp artisan ui vue --auth
See this new article to see the difference between ui:auth commands
Laravel 6.0 — Update Sep 2019:
You might have noticed that after installing a fresh Laravel 6 application and running this command:
php artisan make:authThis scene!

Command “make:auth” is not defined
make:auth command no longer exists! So I add (Part I) a quick update dedicated for Laravel 6 on generating auth scaffolding in Laravel.
Laravel UI Composer package is a new first-party package that extracts the UI portion of a Laravel project ( frontend scaffolding typically provided with previous releases of Laravel ) into a separate laravel/ui package.
The separate package enables the Laravel team to update, develop and version UI scaffolding package separately from the primary framework and the main Laravel codebase.
As a result of this change, no Bootstrap or Vue code is present in default framework scaffolding, and the make:auth command has been extracted (in version 6 of Laravel) from the framework as well.
In order to restore the traditional Vue / Bootstrap scaffolding present in previous releases of Laravel, you may install the laravel/ui package and use the ui Artisan command to install the frontend scaffolding. I will show you.
Laravel does not dictate which JavaScript or CSS pre-processors you use but it provides a basic starting point using Bootstrap and Vue. The Bootstrap and Vue scaffolding provided by Laravel is located in the laravel/ui Composer package, which may be installed using Composer:
Github source of laravel-ui, all presets of laravel ui are here
Laravel new my-test-app#composer require laravel/ui --dev
note: For other kind of ui presets you can see here , tailwindcss
Once you’ve installed laravel/ui you have a couple of commands available to generate UI code ( installing the frontend scaffolding), including authorization.
check this help command:
php artisan ui --helpor
php artisan help uito see more options. If you intend to use Vue, React, or Bootstrap, the UI package provides the following command:
// Generate basic scaffolding...php artisan ui bootstrap
php artisan ui vue
php artisan ui react
// Generate login / registration scaffolding...php artisan ui bootstrap --auth
php artisan ui vue --auth
php artisan ui react --auth
Then
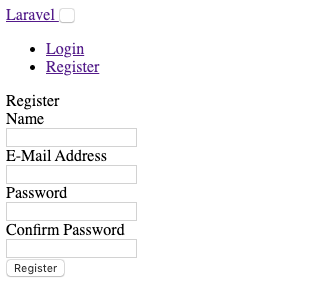
php artisan migrateIf you use the command of registration scaffolding you will see:
Then :
npm install
npm run dev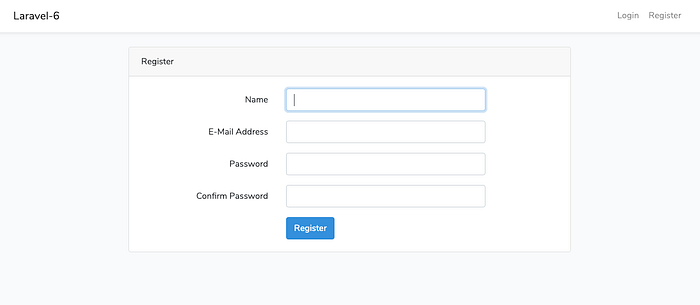
Besides the new ui command, the laravel/ui package comes with another command for generating the auth scaffolding:
php artisan ui:authit will generate the auth routes, a HomeController, auth views, and a app.blade.php layout file.
You can also generate the views only with:
php artisan ui:auth --viewsthe console command will prompt you to confirm overwriting auth files if you’ve already run the command before.
See this new article to see the difference between ui:auth commands
Part II:
Laravel core and Auth in Laravel 5.8 and older
After you do this in terminal:
php artisan make:authIn Laravel 5.8 and 5.7 or older, you will find this in routes/web.php file:
Auth::routes();Route::get('/home', 'HomeController@index');
Auth::routes() will create some routes by default which are not shown in the routes/web.php file.
In fact, Auth::routes() is a helper class that helps you generate all the routes required for user authentication.
Auth is a facade and is defined in config/app.php you will find the class that acts as its provider in that configuration file.

If you want to make your Sublime Text pretty as like as mine read this tutorial!
The Auth::routes() method is in src/Illuminate/Support/Facades/Auth.php or here.
class Auth extends Facade
{
    /**
     * Get the registered name of the component.
     *
     * @return string
     */
    protected static function getFacadeAccessor()
    {
        return 'auth';
    }/**
     * Register the typical authentication routes for an application.
     *
     * @param  array  $options
     * @return void
     */
    public static function routes(array $options = [])
    {
        static::$app->make('router')->auth($options);
    }
}
Also you can browse all the routes in Router class in this link here.
In this link or in your local app inside the file src/Illuminate/Routing/Router.php you will find the routes in line 1149:
public function auth(array $options = [])
    {
// Authentication Routes...
        $this->get('login', 'Auth\LoginController@showLoginForm')
->name('login');
        $this->post('login', 'Auth\LoginController@login');
        $this->post('logout', 'Auth\LoginController@logout')
->name('logout');// Registration Routes...
        if ($options['register'] ?? true) {
            $this->get('register', 'Auth\RegisterController@showRegistrationForm')
->name('register');
            $this->post('register', 'Auth\RegisterController@register');
        }// Password Reset Routes...
        if ($options['reset'] ?? true) {
            $this->resetPassword();
        }// Email Verification Routes...
        if ($options['verify'] ?? false) {
            $this->emailVerification();
        }
    }
In the below screenshot you may see better:

As you can see above for the Registration, Password Reset and also Email Verification Routes there are if statements which by default is set false for only Email Verification Routes section.
It means this line:
$this->emailVerification();won't be run by default in Laravel 5.7 and 5.8.
And also in line 1178 you will see the other remained routes:
public function resetPassword()
    {
        $this->get('password/reset', 'Auth\ForgotPasswordController@showLinkRequestForm')->name('password.request');
        $this->post('password/email', 'Auth\ForgotPasswordController@sendResetLinkEmail')->name('password.email');
        $this->get('password/reset/{token}', 'Auth\ResetPasswordController@showResetForm')->name('password.reset');
        $this->post('password/reset', 'Auth\ResetPasswordController@reset')->name('password.update');
    }
public function emailVerification()
    {
        $this->get('email/verify', 'Auth\VerificationController@show')->name('verification.notice');
        $this->get('email/verify/{id}', 'Auth\VerificationController@verify')->name('verification.verify');
        $this->get('email/resend', 'Auth\VerificationController@resend')->name('verification.resend');
    }
Or see better here:

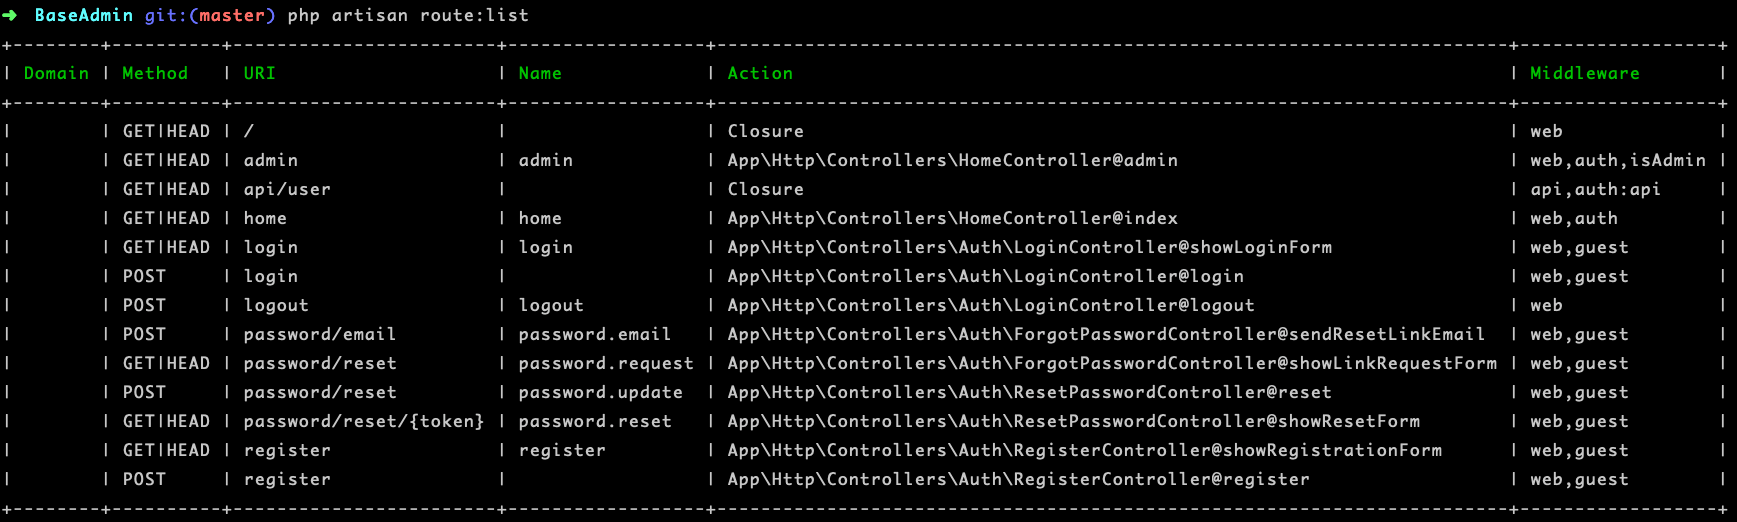
If you want to list all the active route you can do this in terminal :
php artisan route:listphp artisan route:list --compactphp artisan route:list -cphp artisan route:list | grep register # for mac and linuxphp artisan route:list | findstr register. # for windows
The screenshot bellow is an example:
You can also filter the routes via
php artisan route:list --name=
php artisan route:list --path=
php artisan route:list --method=
I hope to publish two other articles about some more technical facts behind the Laravel authentication and how to integrate Laravel authentication with other services, like telegram Stay tuned!
Note 1:
Laravel includes the Auth\VerificationController class that contains the necessary logic to send verification links and verify emails.
In order to get benefits of preset Email Verification Routes in Laravel 5.7 or 5.8 you should register (just activate the routes) the necessary routes for this controller just by passing the verify option to the Auth::routes method like:
Auth::routes(['verify' => true]);Note 2:
Also If you want to change some routes you can overwrite them by inserting just one or some of the above routes inside the routes/web.php file.
Maybe you need to delete this totally:
Auth::routes();and start from scratch and put all of your custom routes inside the body of this function :
Route::group(['middleware' => ['web']], function() {});
Although out of the box, the web middleware group is automatically applied to your routes/web.php file by the RouteServiceProvider. And there is no need to use the 'middleware' => ['web'].
Note 3:
In laravel 5.7 / 5.8 instead of using:
Auth::routes(['verify' => true]);you can use this:
Auth::routes();and then manually insert these in routes/web.php
Route::get('email/verify', 'Auth\VerificationController@show')
->name('verification.notice');
Route::get('email/verify/{id}', 'Auth\VerificationController@verify')->name('verification.verify');
Route::get('email/resend', 'Auth\VerificationController@resend')
->name('verification.resend');
Part III:
Laravel 6 Email Verification Routes
Take a look at line 1194 here in /src/Illuminate/Routing/Router.php in Laravel 6, you can see a difference with Laravel 5.8 here.
As I showed you in Part II, just by passing the verify option to the Auth::routes:
Auth::routes(['verify' => true]);some of the default routes which are necessary for authenticating user become active. Part of these routes are found here : These are responsible for sending activation link and also verifying user’s email. In Laravel 6, there is a second route parameter which is {hash}.
A link containing this hash is sent to the user. Let’s see the progress:
As soon as a user is registered this listener (SendEmailVerificationNotification.php) is triggered:
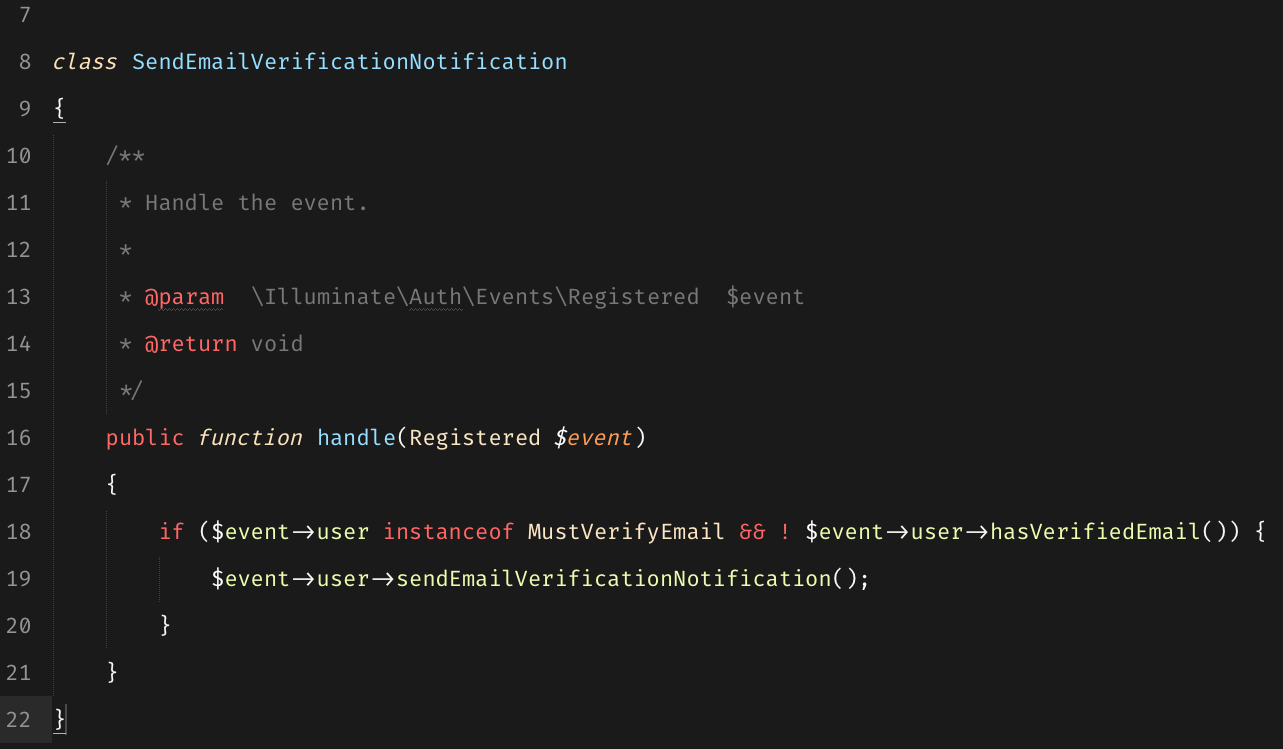
and If the User model implements the MustVerifyEmail trait (read here part Model Preparation) and user record does not have value for this field email_verified_at yet (it means user is not activated) then this notification method: sendEmailVerificationNotification() is permitted to run. This notification method is found in MustVerifyEmail trait.

So it seems the VerifyEmail class is responsible for making the email verification link and sending it to the user. Let’s look at it.

You see the email verification URL is made in the format of Laravel Signed URLs. The end part of the verification link is composed of user’s id and also the sha1 of user’s email address, remember we need these route parameters: email/verify/{id}/{hash}
Let’s find how Laravel verifies this link when the user click on it.
If you activate the default laravel routes by using:
Auth::routes(['verify' => true]);Then VerificationController class and the VerifiesEmails trait are doing the rest jobs. See the verify() method in VerifiesEmails trait.

In the second part you see Laravel make again the sha1 format of user’s email address and then compare it(hash_equals) with what the line has (route parameter: route(‘hash’).
This is what you can not see in older version of Laravel.
Attention: In order to get the authenticated user you see this is used:
$request()->user()This is because of user is permitted to verify the email when she/he is logged in. You can see VerificationController uses this middleware:
$this->middleware('auth');If you are using default Laravel Authentiation and verification Email system as I described above and want to restrict users if they don’t have a verified email you need to use the following middleware for each route:
EnsureEmailIsVerified.php
Have a look at the Kernel.php file and in protected $routeMiddleware array you will find this line:
'verified' => \Illuminate\Auth\Middleware\EnsureEmailIsVerified::class,It means as like as you may use in __construct() of any controller
$this->middleware('auth');you can also use ‘verified’ to ensure that user must have a verified email to access a route.
$this->middleware('verified');I will update this post gradually.
Thank you for reading! If you enjoyed this article:
Clap it ! Share it! Follow Me in Medium!
Also I’d like to hear your opinion on this article. If you have any doubt, question or suggestion please leave a comment below.
Have a very wonderful day!